How to Get Started with Amazon EC2 Windows Instances
Creation of ec2 instance for windows operating system on amazon web service (AWS)
Welcome to my DevOps blog! My name is PAWAN JD BHAGAT, and I am a passionate DevOps Engineer with 6+ years of experience in the field. I created this blog to share my knowledge, experience, and insights on all things related to DevOps.
In this blog, you'll find a variety of content related to DevOps practices, tools, methodologies, and techniques. I'll cover everything from continuous integration and delivery, cloud computing, automation, and infrastructure as code, to monitoring and logging, security, and more. Whether you're a beginner or an experienced DevOps professional, you'll find valuable information and resources here.
I believe that DevOps is not just a set of practices or tools, but a mindset and culture that fosters collaboration, communication, and continuous improvement. Through my blog, I aim to promote this mindset and help organizations and individuals to adopt and implement DevOps practices in their work.
I encourage you to join the DevOps community and engage with me and other readers through comments and discussions. Let's share our experiences, learn from each other, and contribute to the growth of the DevOps community.
Thank you for visiting my blog, and I hope you find it useful and informative.
To get started with Amazon Elastic Compute Cloud, follow this guide (Amazon EC2). You'll discover how to start, connect to, and use a Windows instance. In the Amazon Cloud, an instance is a virtual computer. You can set up and customize the operating system and apps that operate on your instance using Amazon EC2.
Overview
This tutorial's server is an Amazon EBS-backed instance (meaning that the root volume is an EBS volume). You can either designate the Availability Zone in which your instance will operate or let Amazon EC2 choose one for you. Within each Region, there are numerous, separate Availability Zones. Consider an Availability Zone to be a separate data facility.
You secure your instance by providing a key pair (to verify your identify) and a security group when you start it (which acts as a virtual firewall to control ingoing and outgoing traffic). You must provide the private key of the key pair that you provided when you started your instance when connecting to it.
Step 1: Launch an instance
To launch an instance
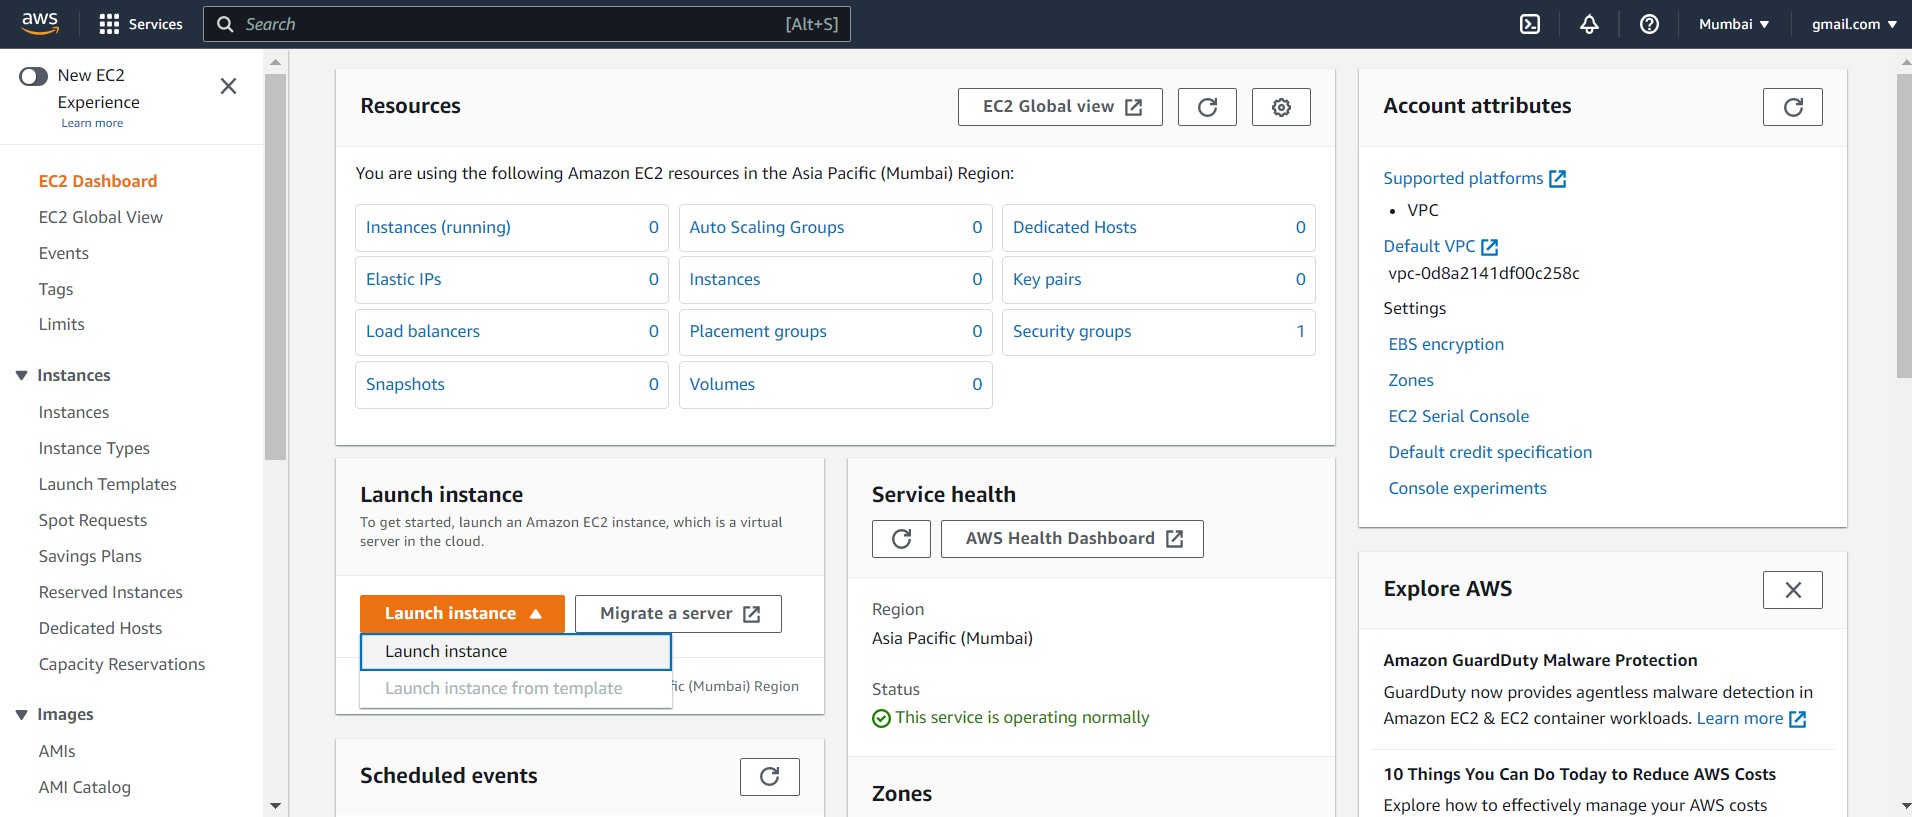
Open the Amazon EC2 console at https://console.aws.amazon.com/ec2/
Select Launch Instance in the Launch instance box on the EC2 console dashboard, then select Launch instance from the list of choices that appears.
Under Name and tags, for Name, enter the name for your instance.
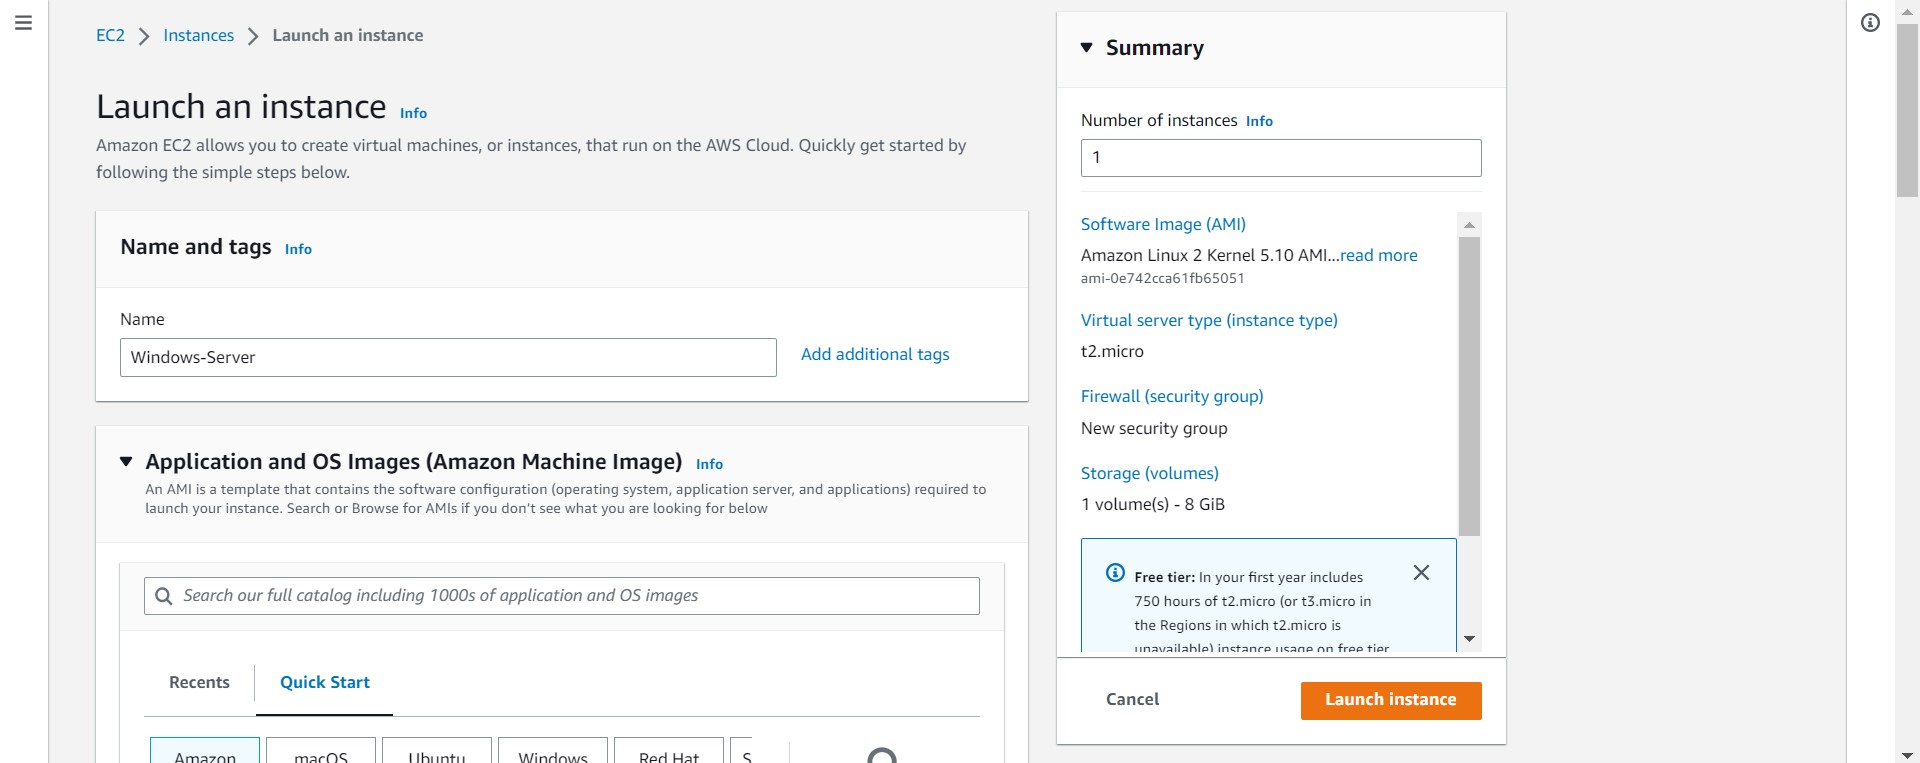
Do the following under Application and System Images (Amazon Machine Image):
Choose Windows after selecting Quick Launch. This is your instance's operating system (OS).
Choose the AMI for Windows Server 2016 Basic or later from the Amazon Machine Image (AMI) menu. These AMIs are designated as Free tier qualified, as you can see. A simple setup called an Amazon Machine Image (AMI) acts as a model for your instance.

Instance type:- You can choose the hardware setup for your instance under Instance type from the Instance type selection. Select the t2.micro instance class, which is the default option. The free option is available for the t2.micro instance type. You can use a t3.micro instance on the free tier in regions where t2.micro is not accessible.

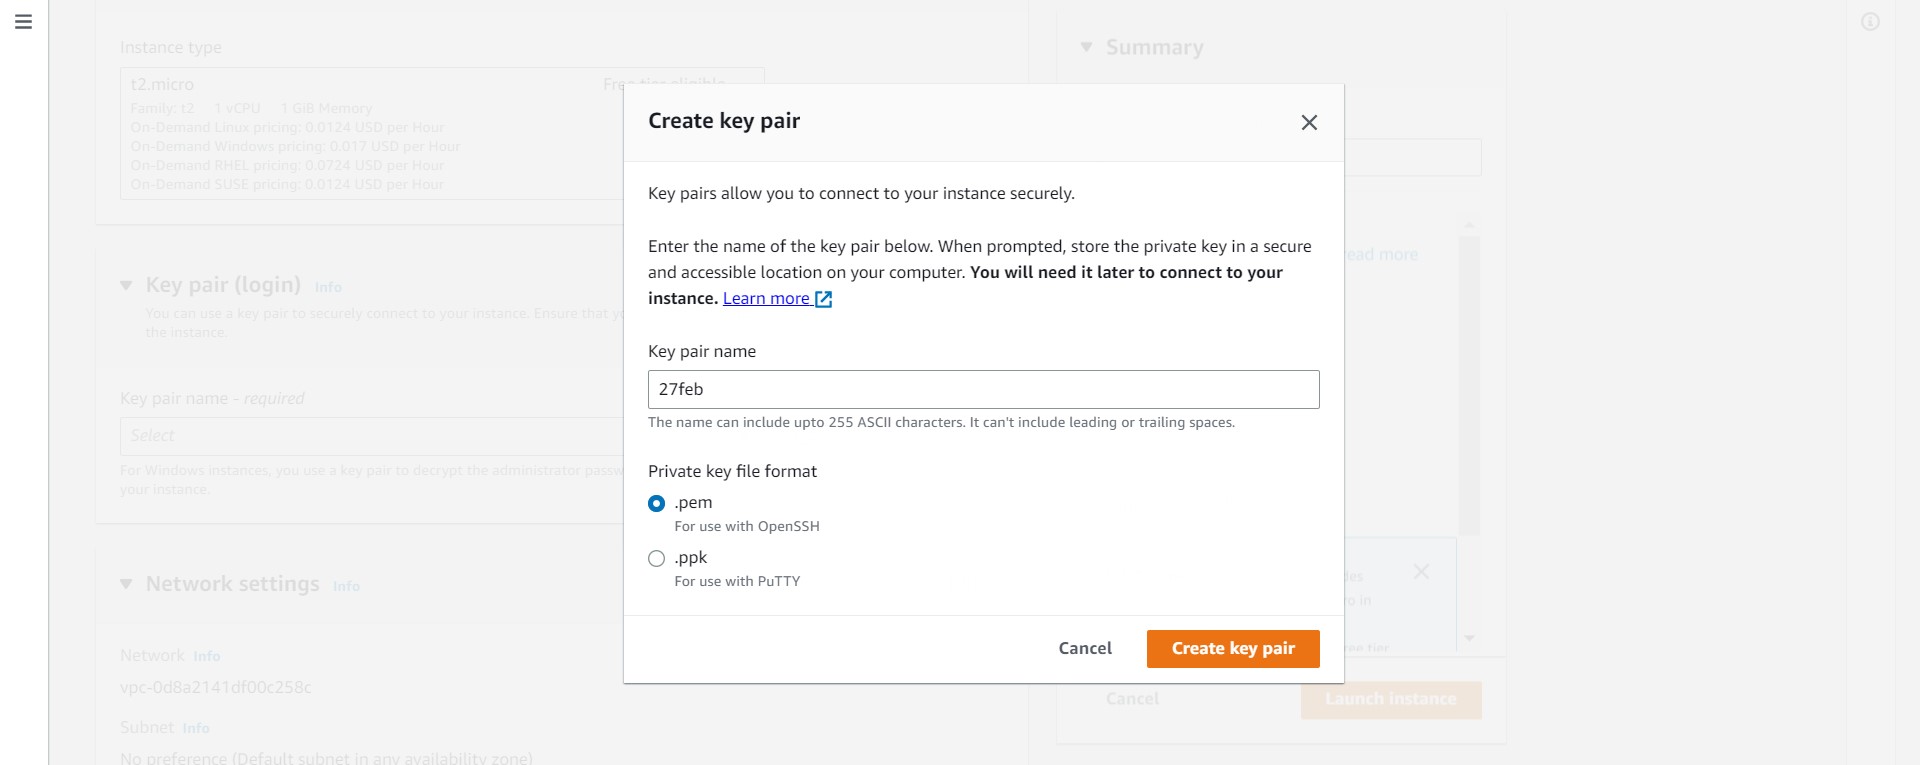
Select the key pair you made when setting up under Key pair (login) for Key pair name.
click on create new key pair and give any name as per convenience and create it.
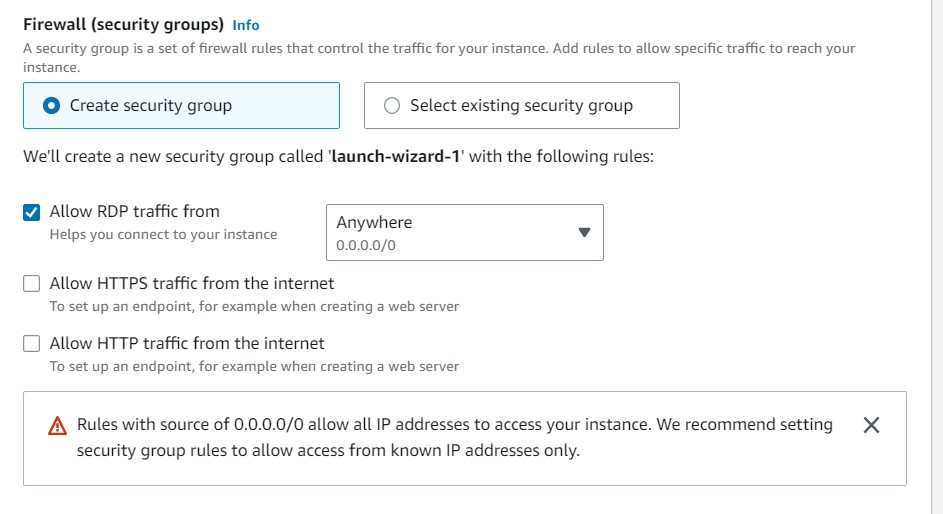
Firewall (security groups)
A security group is a set of firewall rules that control the traffic for your instance. Add rules to allow specific traffic to reach your instance.
Select create a new security group
Configure storage
Specify the storage options for the instance.
make it as it is as per the default

Number of instances
You can specify more than 1 instance to launch. All the instances will launch with the same configuration.
Here we specified only one instance. (Free-tier limitation)

Click on Launch instance

The windows instance is successfully created.
Step 2: Connect to your instance
When using Remote Desktop to connect to your Windows instance, you must first locate the initial administrator password and then input it. After the instance launches, it takes some time before this passcode becomes accessible.
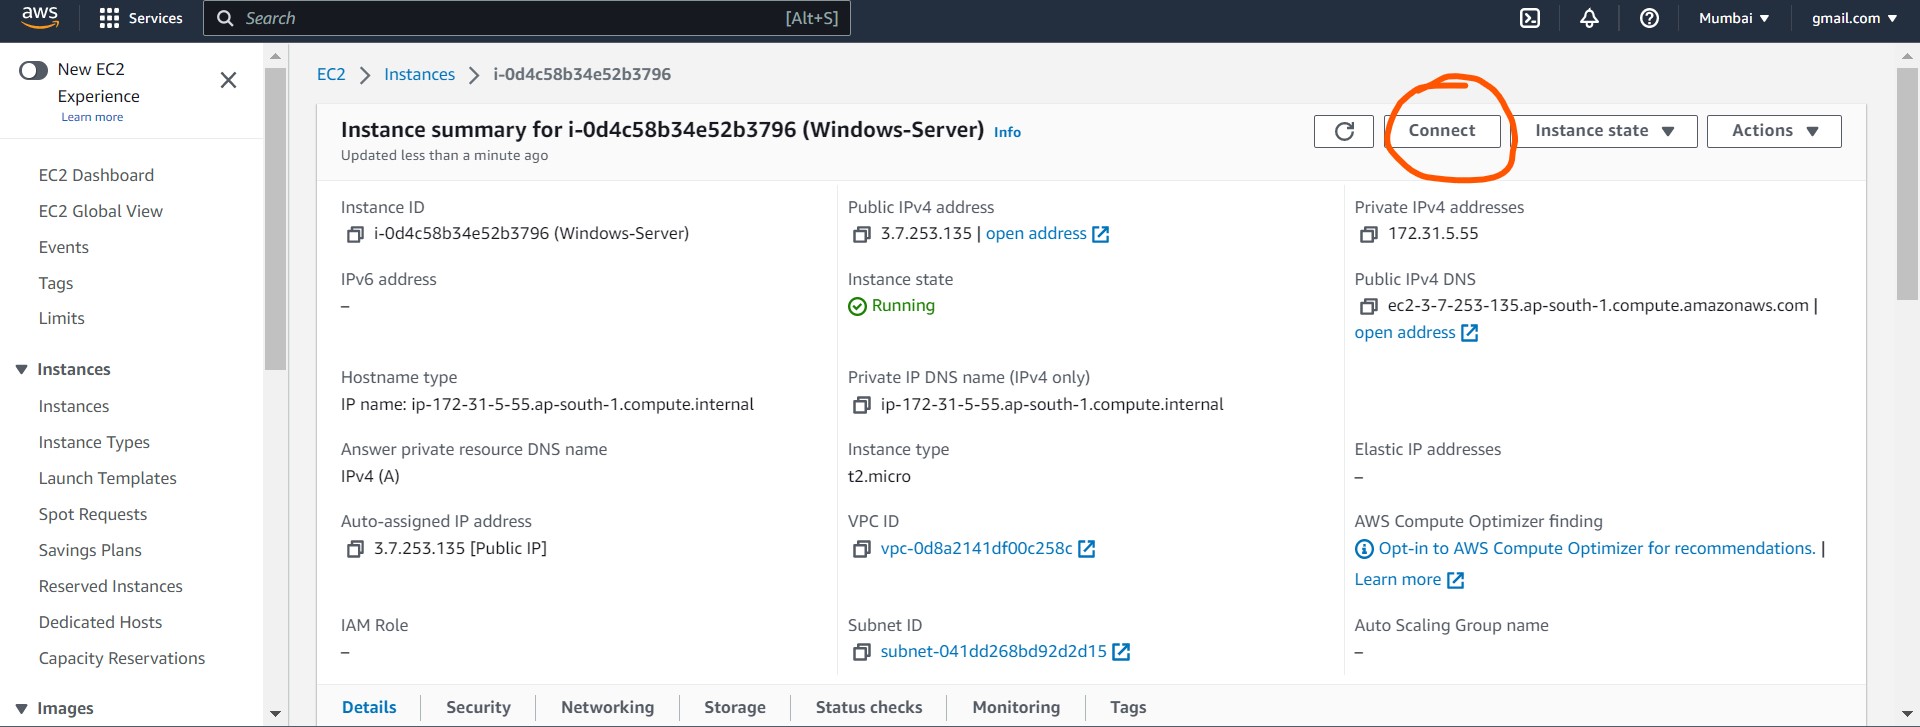
Go to the EC2 dashboard
click on instances (running)
click on the instance id of that particular instance
click on connect
click on RDP client
click on get password
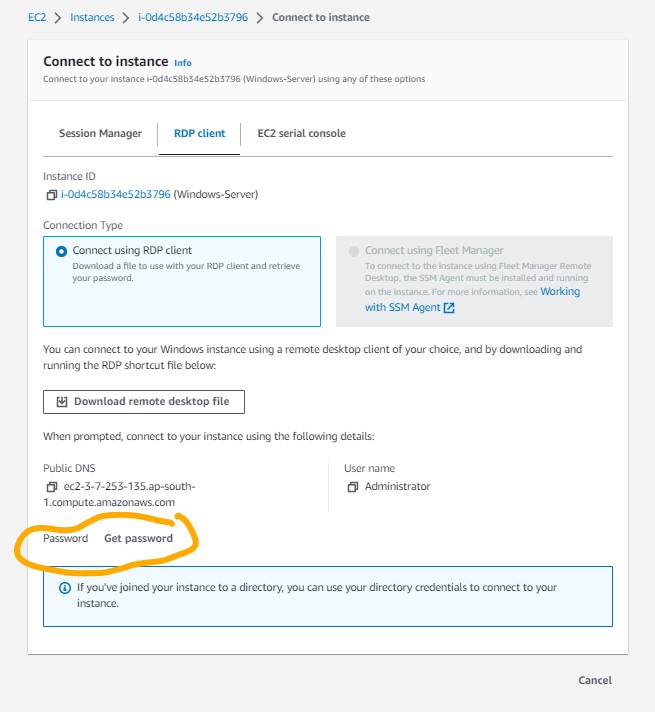
Upload a private key file which is downloaded automatically at the time of creating key pair
Click on decrypt password and save that password for login
Download remote desktop file You can connect to your Windows instance using a remote desktop client of your choice, and by downloading and running the RDP shortcut file

double click on the downloaded remote desktop file.
and enter the password.
Step 3: Clean up your instance
After you've finished with the instance that you created for this tutorial, you should clean up by terminating the instance.
I hope you found this post helpful.
Thank you!
Pawan Bhagat


