Creating Linux EC2 Instance
Welcome to my DevOps blog! My name is PAWAN JD BHAGAT, and I am a passionate DevOps Engineer with 6+ years of experience in the field. I created this blog to share my knowledge, experience, and insights on all things related to DevOps.
In this blog, you'll find a variety of content related to DevOps practices, tools, methodologies, and techniques. I'll cover everything from continuous integration and delivery, cloud computing, automation, and infrastructure as code, to monitoring and logging, security, and more. Whether you're a beginner or an experienced DevOps professional, you'll find valuable information and resources here.
I believe that DevOps is not just a set of practices or tools, but a mindset and culture that fosters collaboration, communication, and continuous improvement. Through my blog, I aim to promote this mindset and help organizations and individuals to adopt and implement DevOps practices in their work.
I encourage you to join the DevOps community and engage with me and other readers through comments and discussions. Let's share our experiences, learn from each other, and contribute to the growth of the DevOps community.
Thank you for visiting my blog, and I hope you find it useful and informative.
In this blog, we will see how to create the EC2 instance for a Linux environment, in the previous blog we learned basics about the cloud, EC2 instance, and its components
Step 1: - Login and Go to the AWS dashboard
https://aws.amazon.com/console/
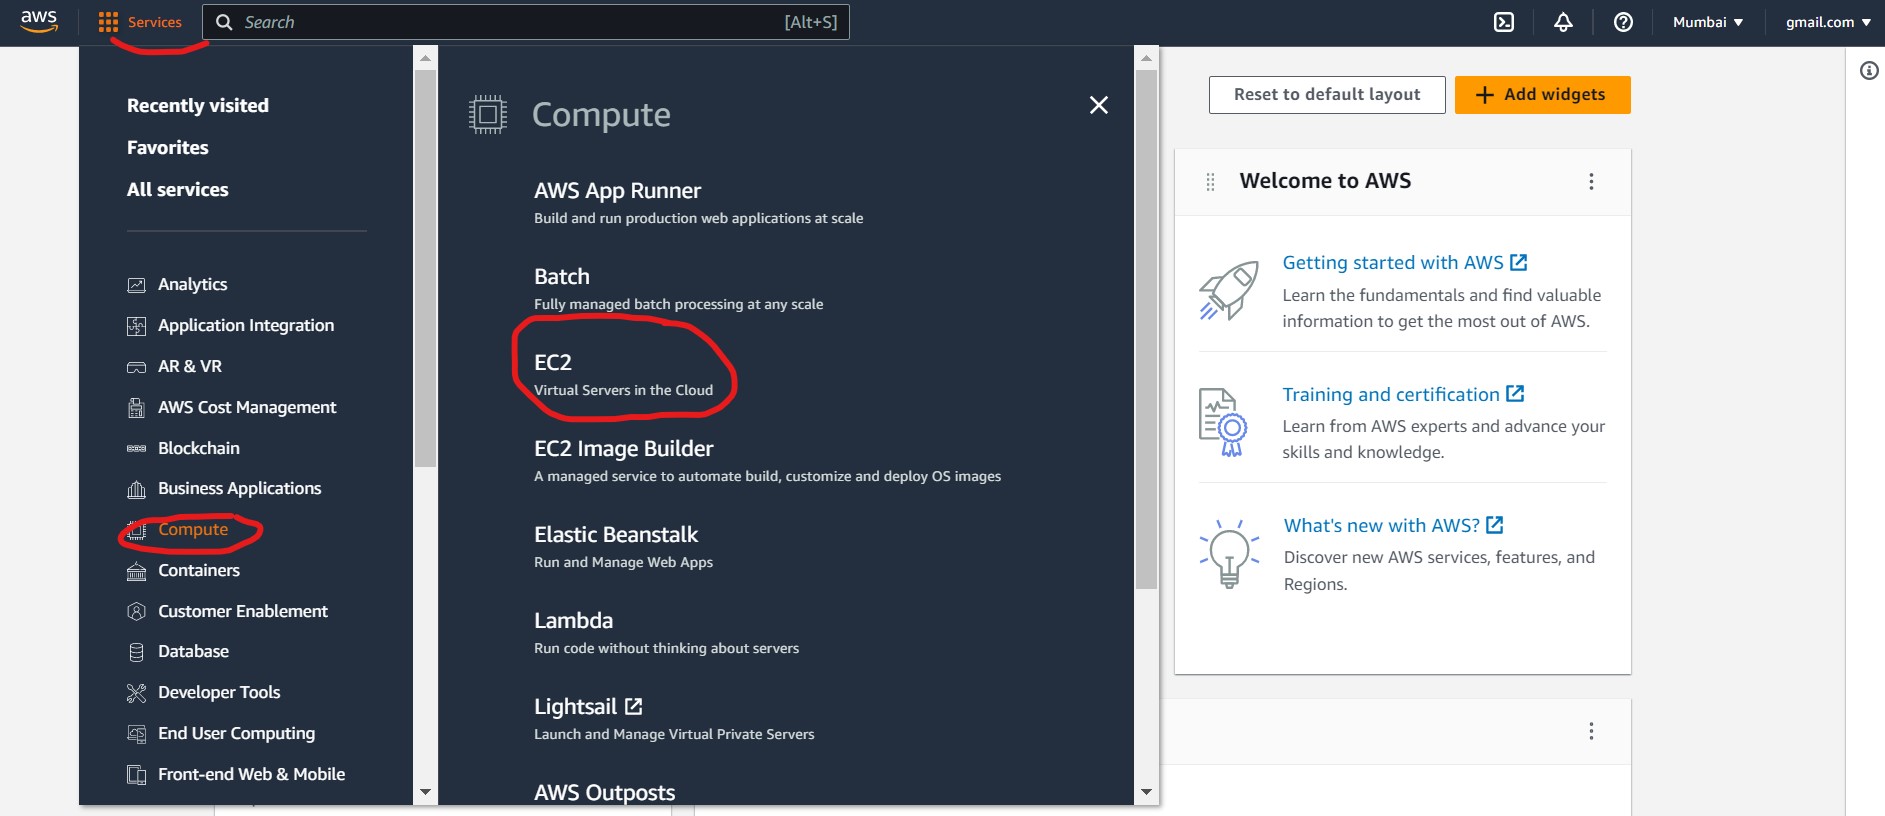
Go to:-
Services ----> Compute ----> EC2
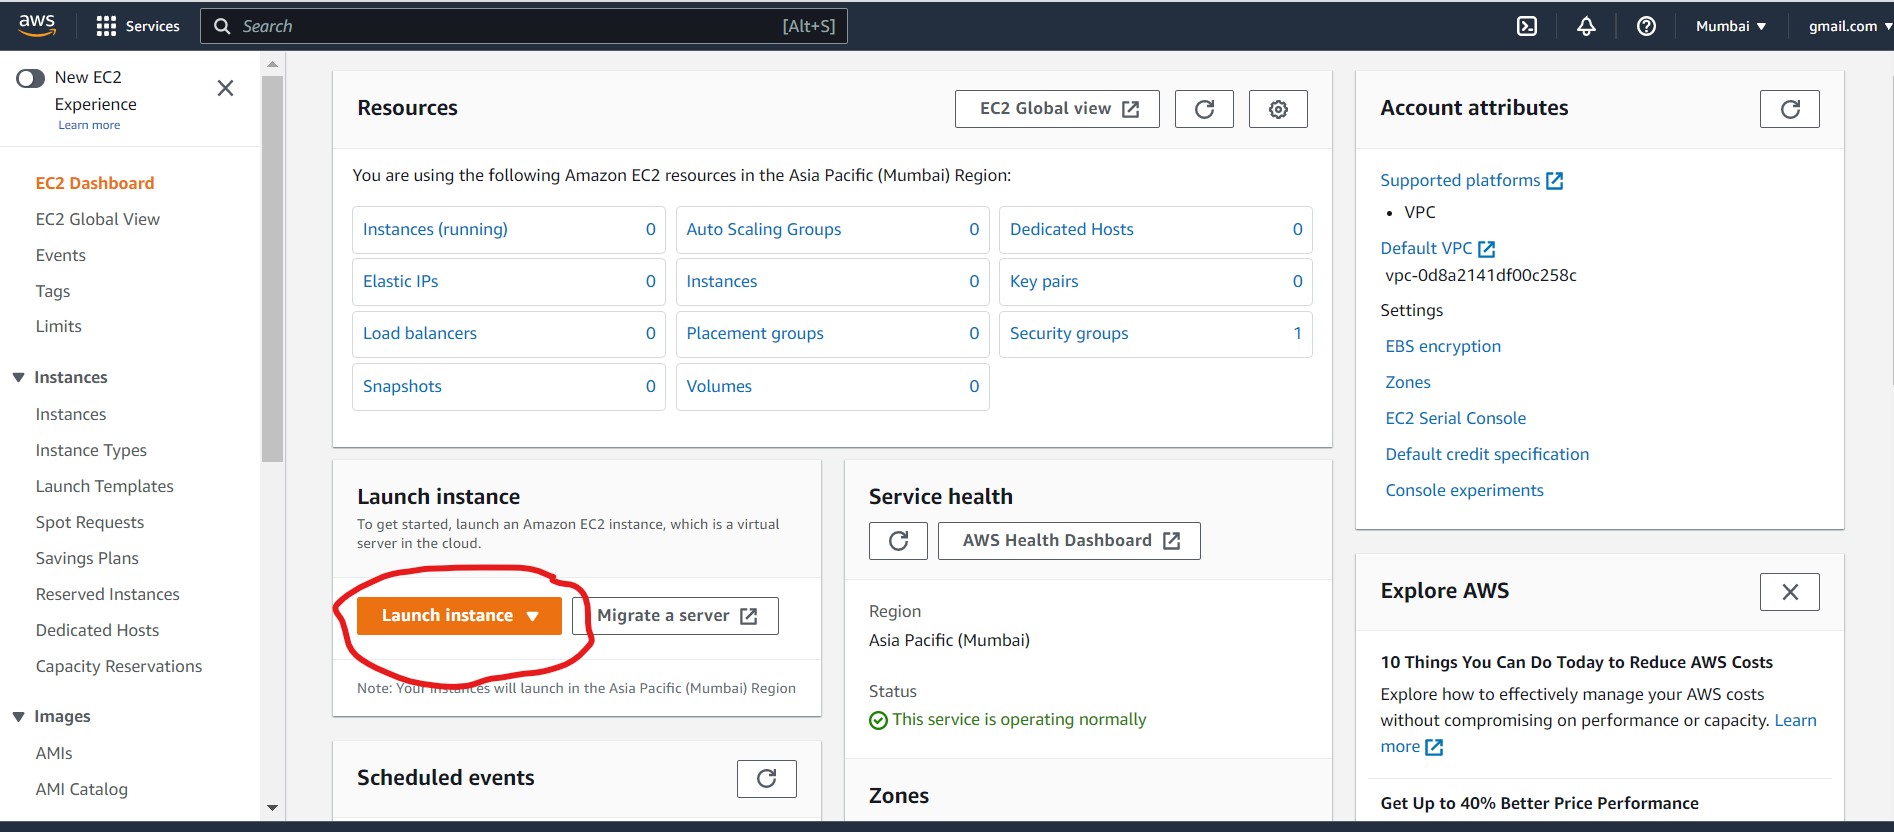
After clicking on EC2 below screen will appear
Click on Launch instance
After that, we have to do the configuration for instance like, giving name, instance type, security groups etc.
- Give the Name to Server i.e:- Server-1

Choose AMI
An AMI contains the software configuration (operating system (OS), application server, and applications) required to launch your instance.
Note:- Always choose free tier-eligible images for practice purposes to avoid billing.

Choose instance type
Select an instance type that meets your computing, memory, networking, or storage needs.
Choose Free tier eligible

Key Pair
To specify a key pair in your launch template, you can select the key pair from the Key pair name field.
Click on:- Create new key pair

The key pair name should be anything and the private key file format should be in .ppk (its use to connect instances through putty software)
After clicking on create key pair then downloaded the key with the .ppk extension
Security Group
A security group is a set of firewall rules that control the traffic for your instance. Add rules to allow specific traffic to reach your instance.

Configure storage
Specify the storage options for the instance.

Number of instances
You can specify more than 1 instance to launch. All the instances will launch with the same configuration.
To ensure faster instance launches, break up large requests into smaller batches. For example, create 5 separate launch requests for 100 instances each instead of 1 launch request for 500 instances.

Here we have to create only one instance.
Click on Launch instance

The instance is created successfully.
Now Go to EC2-Dashboard
Click in Instance (Running)

the instance is running without any errors
Connect instance through putty
click on instance id
and copy public ip4 dns

Open putty software
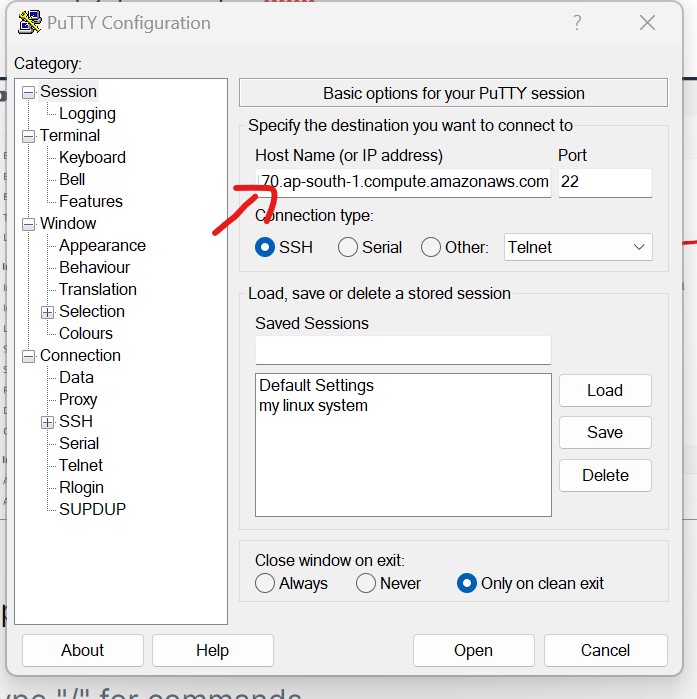
paste the URL in the HOSTNAME or (IP address)
setup .ppk file
in the category click ---> connection --->ssh --->auth
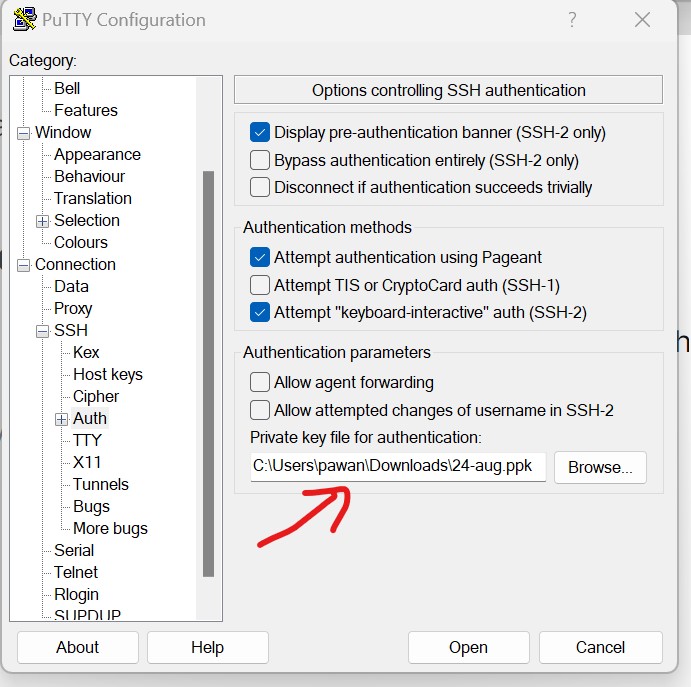
browse the key which we downloaded
click on open
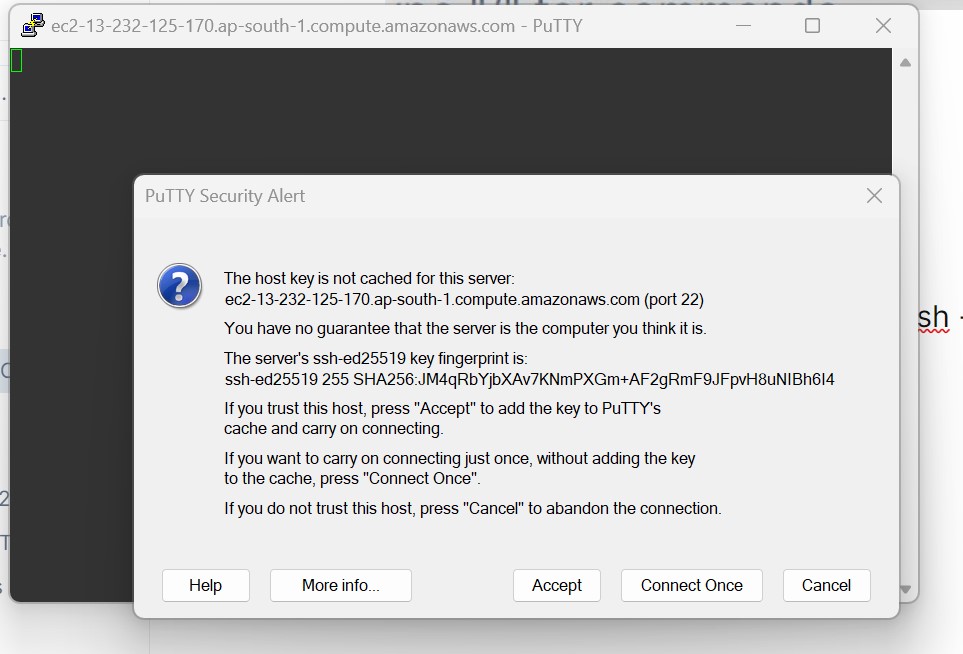
click on accept and you can enter into the Linux instance.
Login with ec2-user and log in without a password.
I hope you found this post helpful.
Thank you!


